SUMMARY
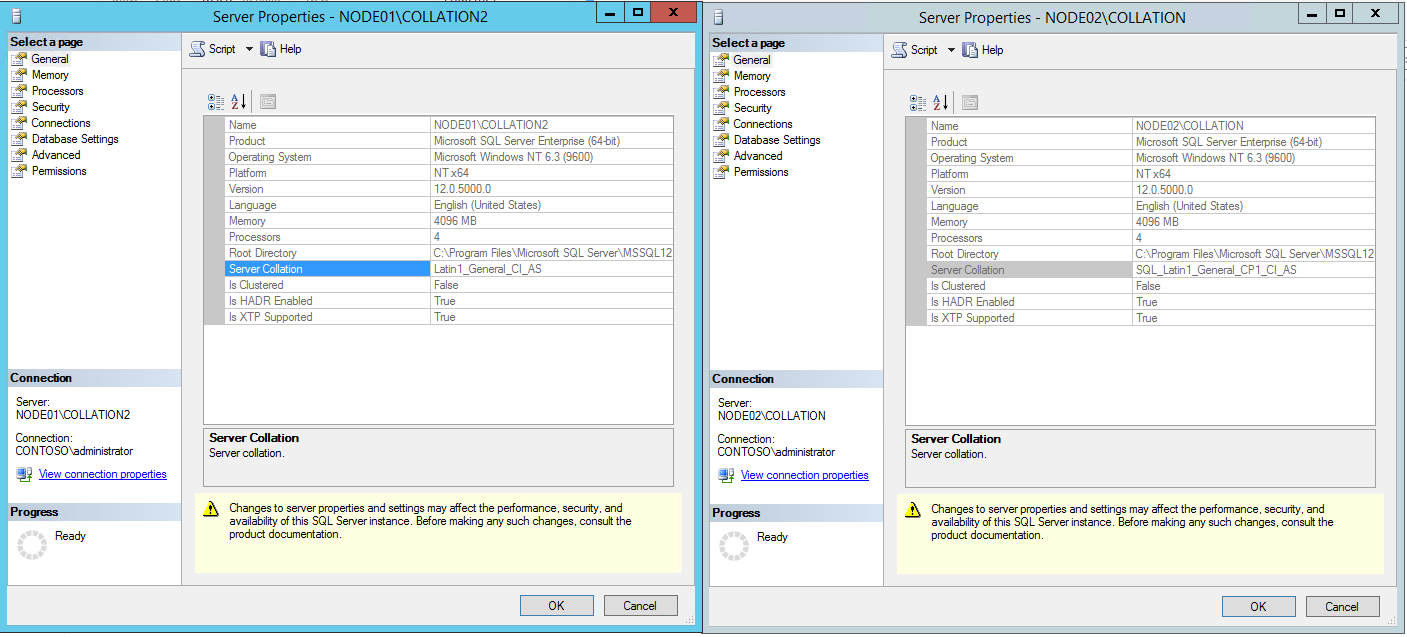
You have successfully installed and configured a 2-Node Cluster with Always On which has been deployed into Production. Well you notice later that your 2 SQL Server Standalones participating in your AlwaysOn have different Server Collation.
Assuming:
Server A: Latin1_General_CI_AS – Case Insensitive
Server B: SQL_Latin1_General_CP1_CI_AS
ACTION
We are instructed as DBA’s to get this issue resolved to meet business requirements and standards and have both replicas have the same Server Collation.
STEPS:
Different Collation with 2 node cluster and AlwaysOn configured. No replication and no maintenance jobs on the server. Make sure to have the setup media for your SQL Server 2014 Enterprise Edition for step 8 below. Your current version “SQL Version Name – Microsoft SQL Server 2014 (SP2) (KB3171021) – 12.0.5000.0 (X64)” Machine Name – REBEL SQL Server Name – REBEL\MSSADMIN
STEP 1 : Create Backup of both VM’s in case we need to rollback changes
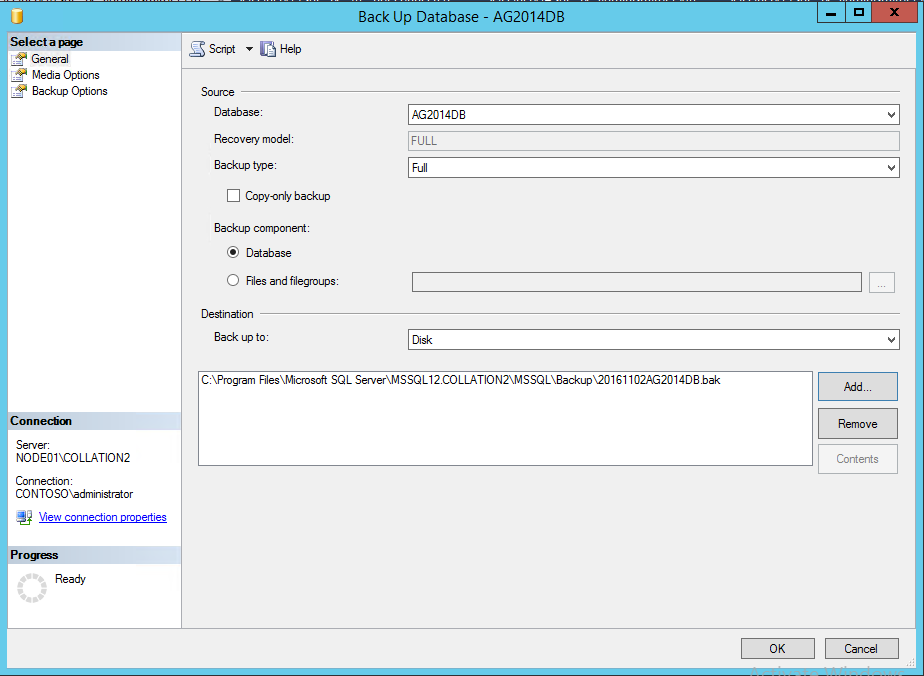
STEP 2: Create a full database backup and transaction log backup of all USER databases on the primary with the wrong Collation

STEP 3 : Run sp_configure to find the current server settings,for this you have to set ‘show advanced option’ to 1.
exec sp_configure ‘show advanced options’,1
reconfigure with override
Now run the sp_configure command to extract the server settings.
exec sp_configure
Copy the output into an excel sheet and save it in a safe location.You would need this after the collation has been changed.
STEP 4: Script out all the SQL Server Agent jobs on the server. – https://technet.microsoft.com/en-us/library/ms191450(v=sql.105).aspx
STEP 5: check whether any mail profiles are present and copy the details of each profile to a table on one of the user databases.
(use msdb’s sysmail_account,sysmail_profile,sysmail_profileaccount and sysmail_server to retrieve profile related information).
In order to create profile and account you can manipulate the code excerpt given below
BEGIN TRAN
SET @DESCRIPTION = ‘give description about the profile ‘;
SET @DESCRIPTION = @DESCRIPTION + @V_MAIL_PROFILE ;
— Create a Database Mail profile
EXECUTE msdb.dbo.sysmail_add_profile_sp
@profile_name = @V_MAIL_PROFILE,
@description = @DESCRIPTION;
SET @DESCRIPTION = ‘give description about the account ‘;
SET @DESCRIPTION = @DESCRIPTION + @V_MAIL_ACCOUNT ;
— Create a Database Mail account
EXECUTE msdb.dbo.sysmail_add_account_sp
@account_name = @V_MAIL_ACCOUNT,
@description = @DESCRIPTION,
@email_address = @EMAIL_ADDRESS,
@replyto_address = @EMAIL_ADDRESS,
@display_name = @DISPLAY_NAME,
@mailserver_name = @MAILSERVER_NAME;
— Add the account to the profile
EXECUTE msdb.dbo.sysmail_add_profileaccount_sp
@profile_name = @V_MAIL_PROFILE,
@account_name = @V_MAIL_ACCOUNT,
@sequence_number = @SEQUENCE_NUMBER;
— Grant access to the profile to the DBMailUsers role
EXECUTE msdb.dbo.sysmail_add_principalprofile_sp
@profile_name = @V_MAIL_PROFILE,
@principal_id = @PRINCIPAL_ID,
@is_default = @IS_DEFAULT;
COMMIT TRAN
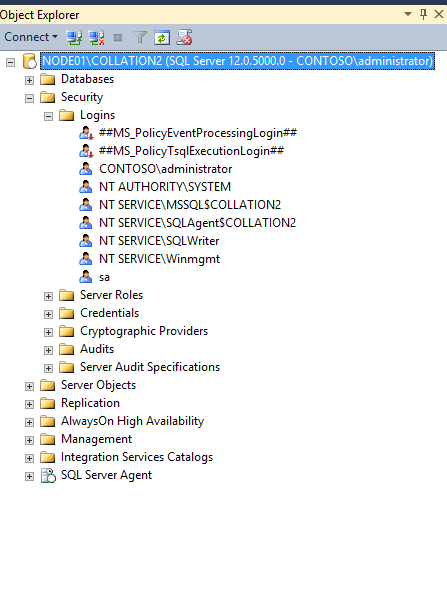
STEP 6: Script out the logins on server and prepare a list that contains the permissions provided for each login.
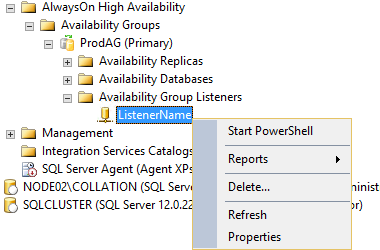
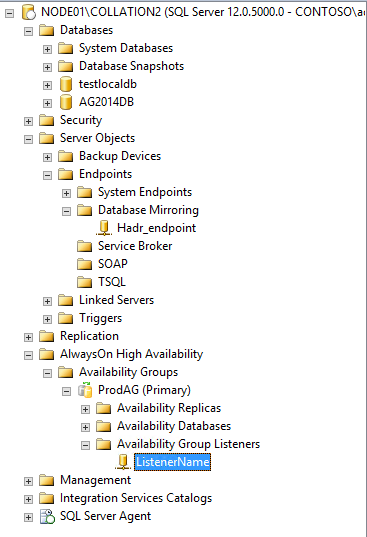
STEP 7: Delete Listener (On primary)
USE [master]
GO
/****** Object: AvailabilityGroupListener [ListenerName] Script Date: 11/1/2016 6:53:18 PM ******/
ALTER AVAILABILITY GROUP [ProdAG]
REMOVE LISTENER N’ListenerName’;
GO
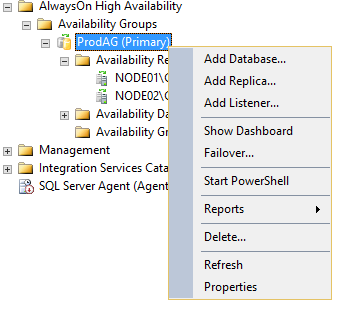
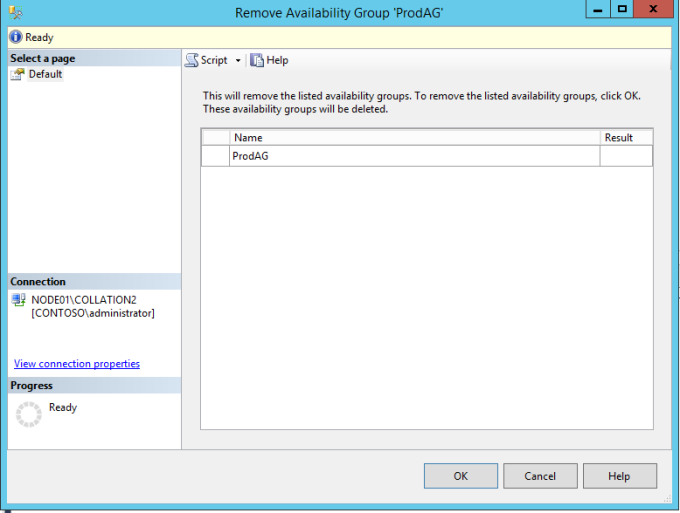
STEP 8: drop availability group (On primary) Note – this will put AG databases in restoring state on secondary
USE [master]
GO
/****** Object: AvailabilityGroup [TestAG] Script Date: 11/1/2016 4:53:38 PM ******/
DROP AVAILABILITY GROUP [ProdAG];
GO
Delete AG
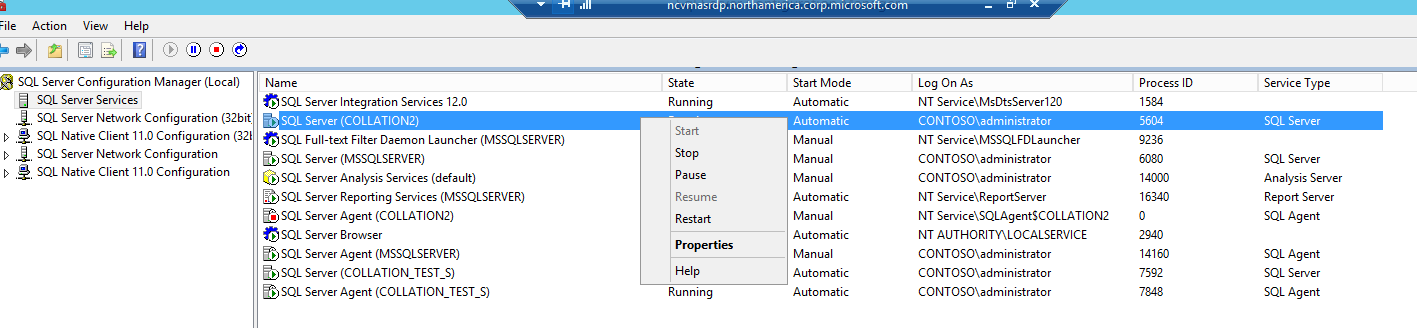
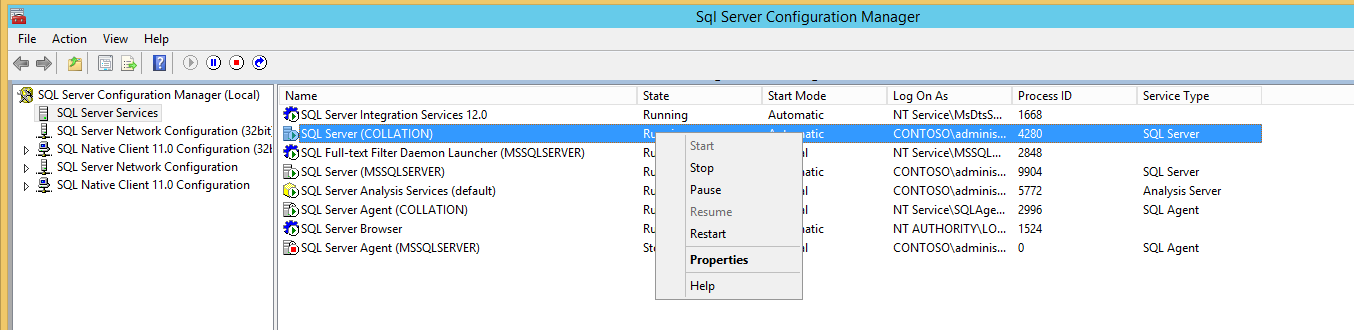
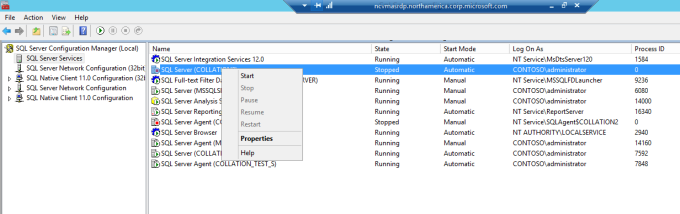
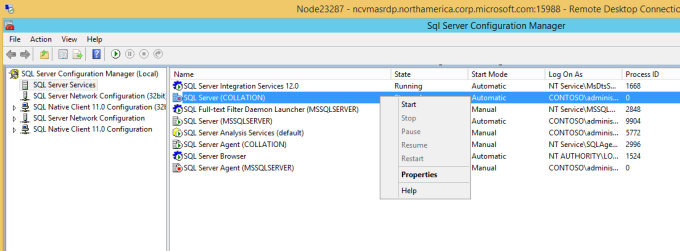
STEP 9: Stop SQL Server through configuration manager on both nodes. Keep in mind domain account used for SQL Server Instance name, example below uses CONTOSO\Administrator (Secondary Node 1st then primary Node)
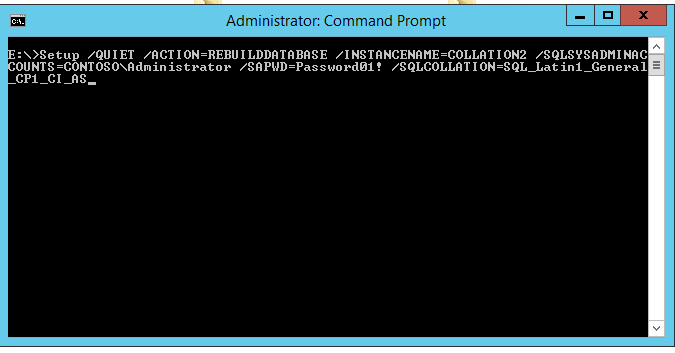
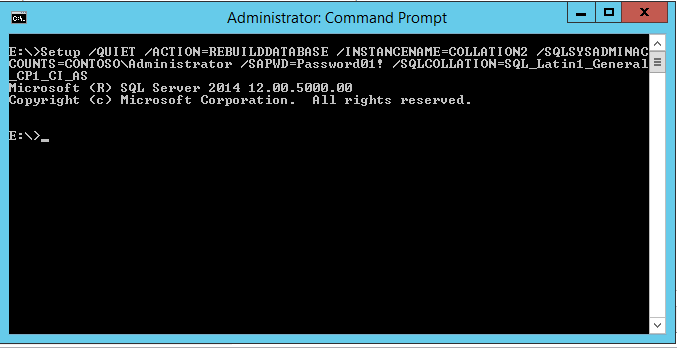
STEP 10 : On server with incorrect COLLATION run the following command using your SQL Server media, use the domain account for SQL Server service(Example CONTOSO\ADMINISTRATOR). On my example below I mounted the media to E:\ drive
Setup /QUIET /ACTION=REBUILDDATABASE /INSTANCENAME=COLLATION2 /SQLSYSADMINACCOUNTS=CONTOSO\Administrator /SAPWD=** /SQLCOLLATION=SQL_Latin1_General_CP1_CI_AS
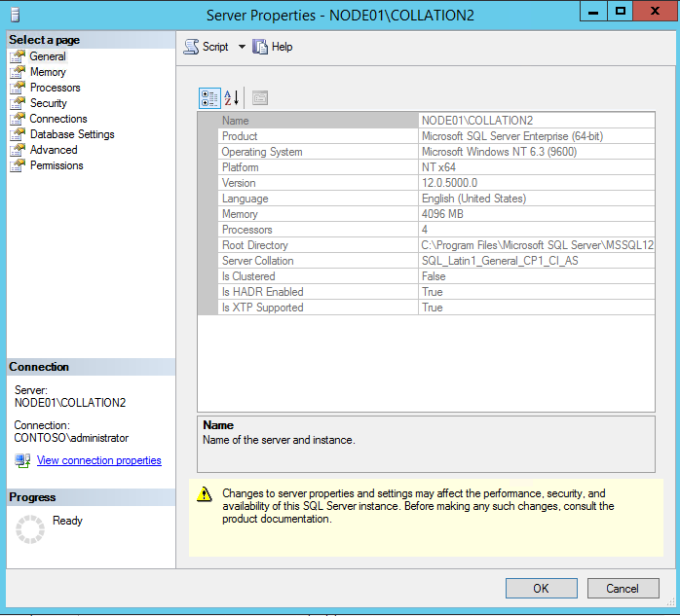
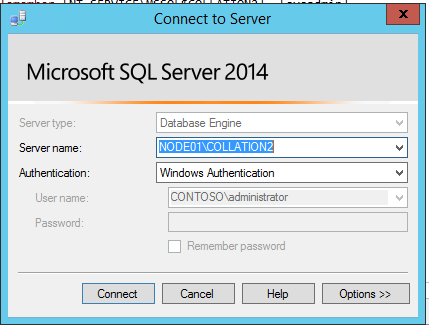
STEP 11 : Start SQL Server through configuration manager on bad Node à Connect to SQL Server Management Studio à Right click Instance name and check COLLATION
(Example below was changed from Latin1_General_CI_AS to SQL_Latin1_General_CP1_CI_AS)
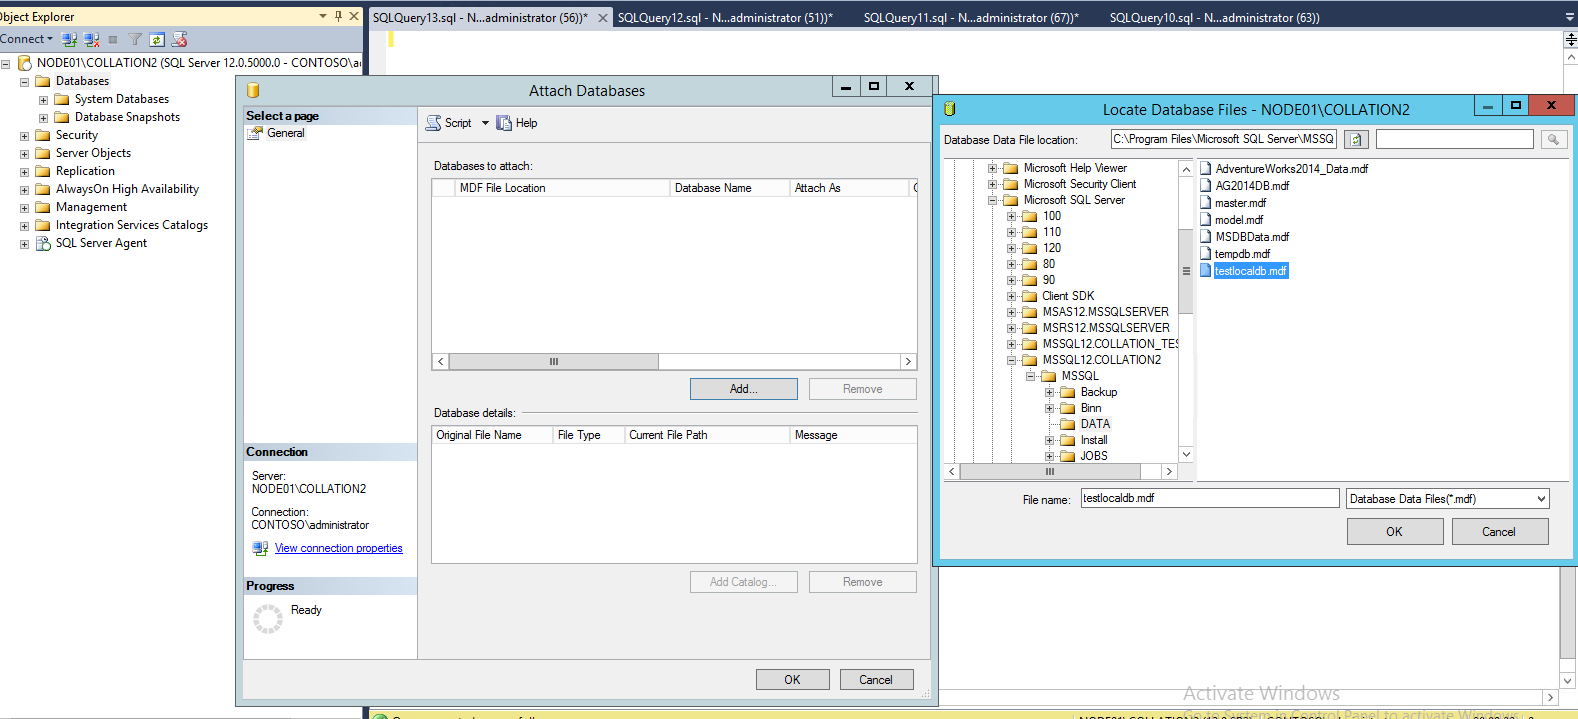
STEP 12: Attach each database localtestdb –> Click OK –> Click OK
For my test environment via T-SQL or GUI –
USE [master]
GO
CREATE DATABASE [AdventureWorks2014] ON
( FILENAME = N’C:\Program Files\Microsoft SQL Server\MSSQL12.COLLATION2\MSSQL\DATA\AdventureWorks2014_Data.mdf’ ),
( FILENAME = N’C:\Program Files\Microsoft SQL Server\MSSQL12.COLLATION2\MSSQL\DATA\AdventureWorks2014_Log.ldf’ )
FOR ATTACH
GO
STEP 13: Check under security, and just run the command for the logins that are not already here. In my example I only had to add the following account “testnode1”
USE master
CREATE LOGIN [testnode1] WITH PASSWORD=0x0200b9e84f64f02a91f31214e48daefd72c3438068f8c94aa68a7f45b27ee487292a8244b9fc92d852ad14797039b6e042b2b1b4f070466241d337e055568fadf62795babd88 HASHED, SID=0xc373b220e1279a4089db7b9fe656f248, DEFAULT_DATABASE=[master], DEFAULT_LANGUAGE=[us_english], CHECK_EXPIRATION=OFF, CHECK_POLICY=OFF
CREATE LOGIN [Testnode2localuser] WITH PASSWORD=0x0200633f51b19f09128261def02a1e737dfc3e650460e61473f3b803e24b1ca24118f7bdc100e5c6d92420f28ca93f2d5fc0c28ab4bc65dac304f6793891bfb07557b76d0e88 HASHED, SID=0x112a26acd6ba8a4f977f1ca3ba036eea, DEFAULT_DATABASE=[master], DEFAULT_LANGUAGE=[us_english], CHECK_EXPIRATION=ON, CHECK_POLICY=ON
Note reset SA password
STEP 14: Add roles, for my test environment I executed the following
EXEC sp_addsrvrolemember [CONTOSO\administrator], [sysadmin]
EXEC sp_addsrvrolemember [NT SERVICE\SQLWriter], [sysadmin]
EXEC sp_addsrvrolemember [NT SERVICE\Winmgmt], [sysadmin]
EXEC sp_addsrvrolemember [NT SERVICE\MSSQL$COLLATION2], [sysadmin]
EXEC sp_addsrvrolemember [NT SERVICE\SQLAgent$COLLATION2], [sysadmin]
STEP 15: Use results of STEP 2 to configure your SQL Server 2014 – https://msdn.microsoft.com/en-us/library/ms178067(v=sql.120).aspx
Example A
The following example sets the max server memory option to 4 GB:
sp_configure ‘show advanced options’, 1; GO RECONFIGURE; GO sp_configure ‘max server memory’, 4096; GO RECONFIGURE; GO
STEP 16: Results of STEP 3, use to recreate all SQL Server Agent Jobs
STEP 17: Recreate mail profiles from STEP 4
STEP 18: Check and if necessary Upgrade to SQL Server 2014 SP2
(I did not have to upgrade after rebuilding my system databases with correct collation, doublecheck with select @@version) – https://www.microsoft.com/en-us/download/details.aspx?id=53168
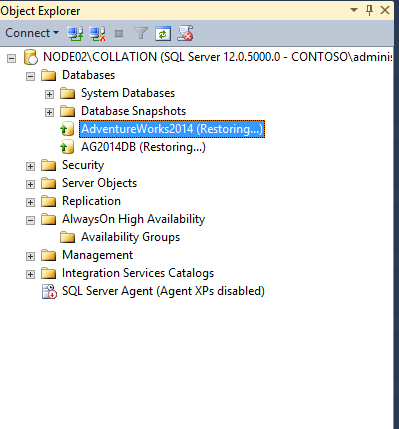
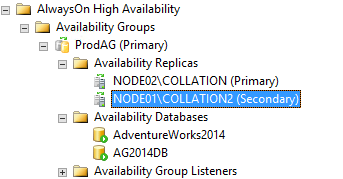
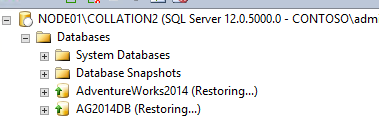
STEP 19A: Start SQL Server on the other node which has the correct COLLATION through configuration manager and open up SQL Server management studio (see below all my AlwaysOn databases are all in restoring state)
STEP 19B: When I did not shut down both servers and I only changed the COLLATION on primary. 2nd server became primary, the databases did not come back up with restoring state. In this scenario I had to restore databases with NO RECOVERY and Add replica to the availability group
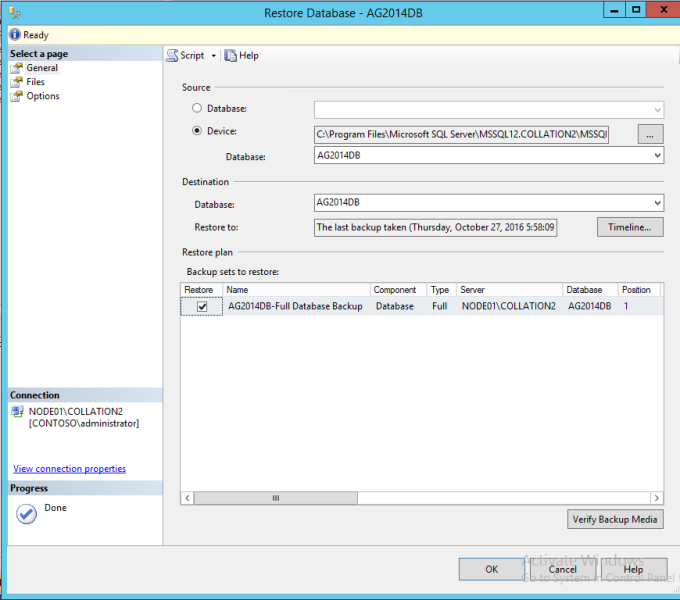
Restored DB from full backup with NO RECOVERY
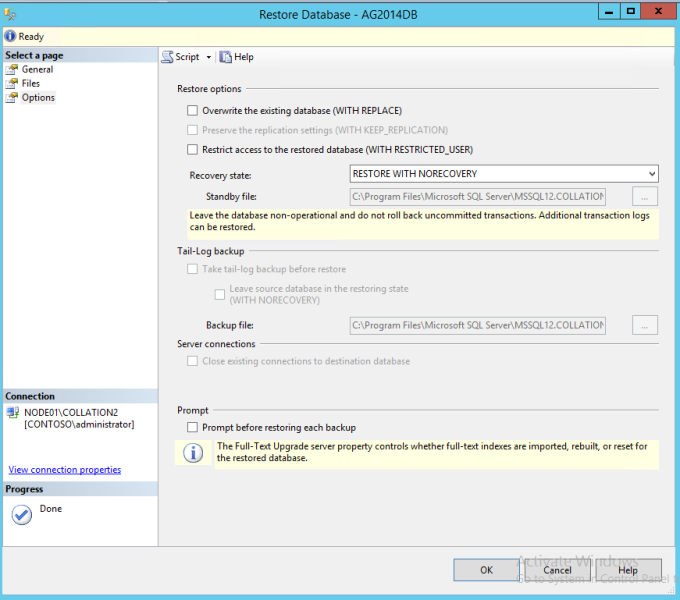
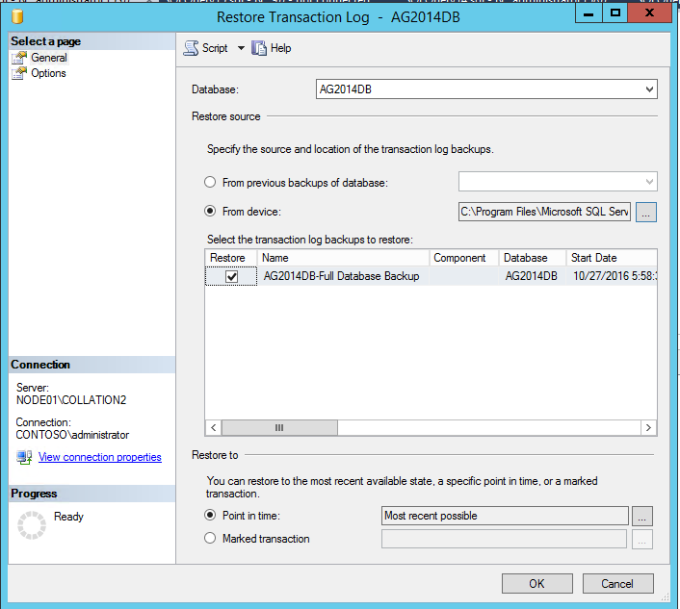
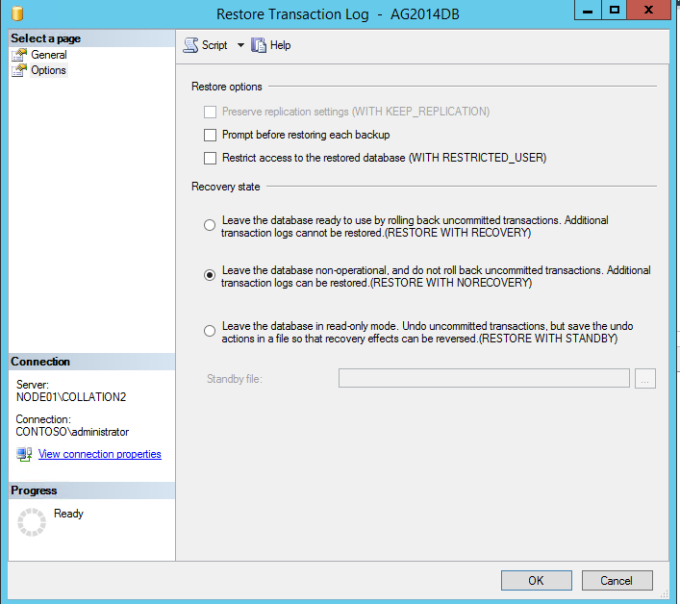
Restored transaction log backup with NO RECOVERY
I then went to primary server and right clicked secondary –> Connect
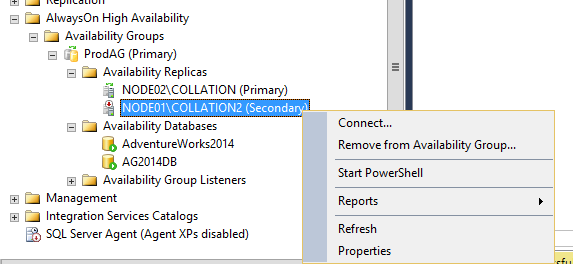
After connecting it no longer showed red icon next to the name but a green arrow like below
On the secondary server databases still showed Restoring state
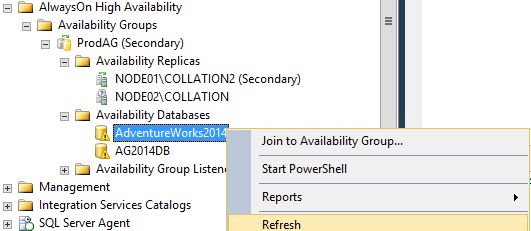
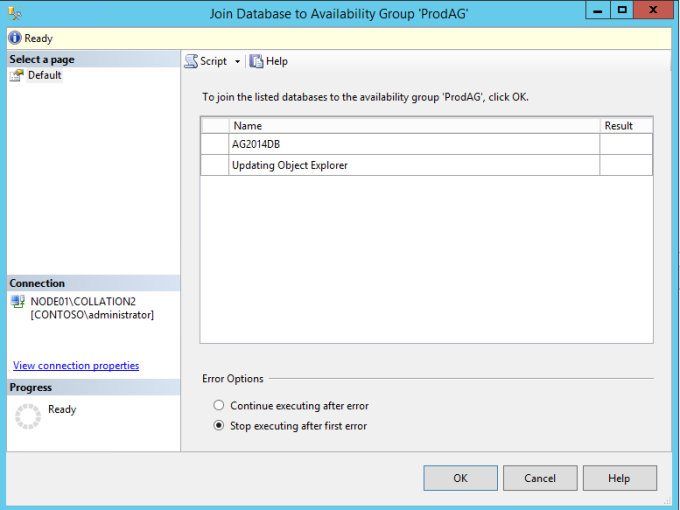
Under Availability Databases –> Right click database –> Join to Availability Group (will have to be done for each database). Click OK on the Join Database to AG Dialog Box
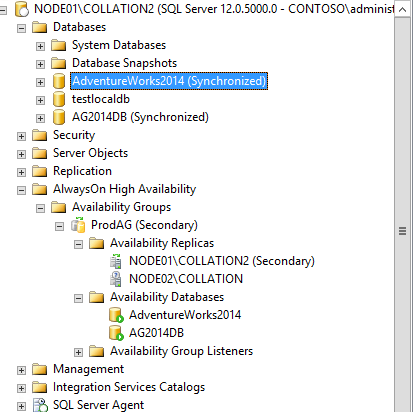
Replicas successfully added and show in Synchronized state
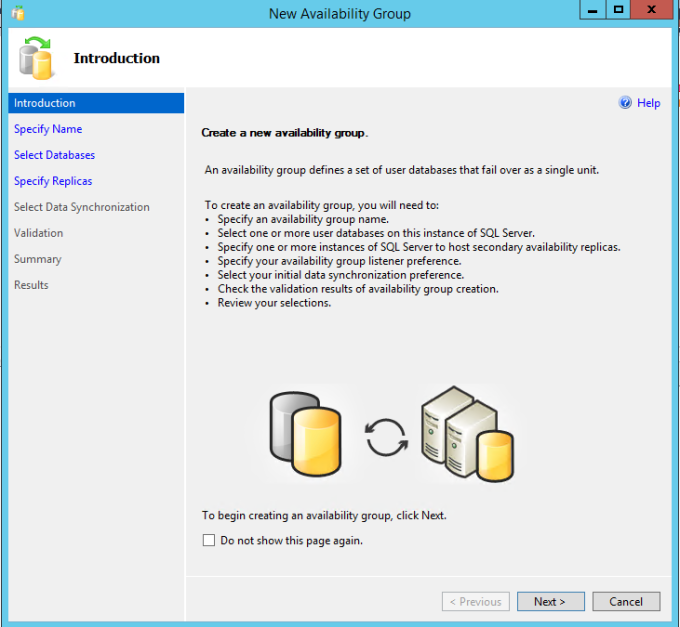
STEP 20: On primary Node –> Right Click Availability Groups –> New Availability Group Wizard –> Click Next
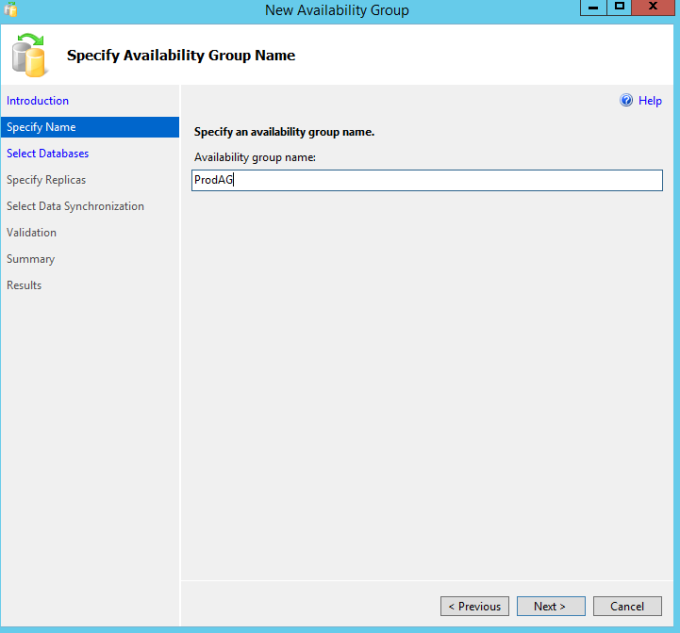
Input name for availability group –> click Next
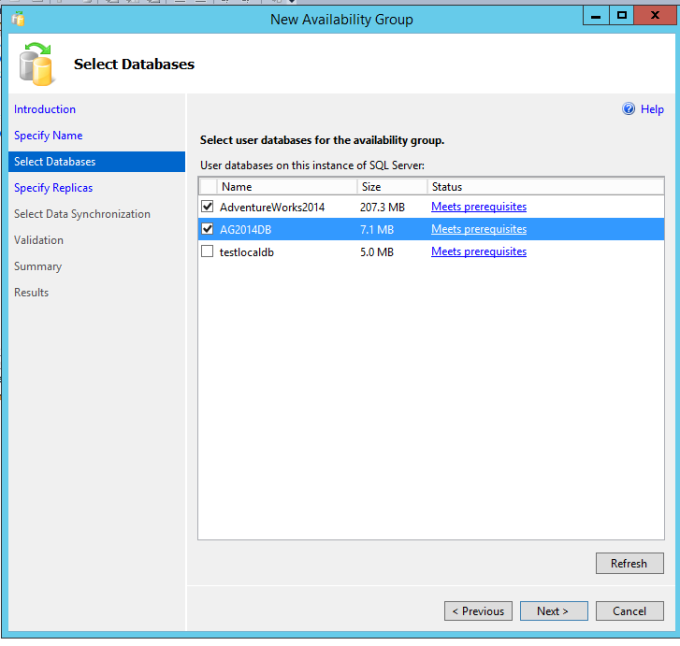
Select databases to include in Availability group –> Click Next
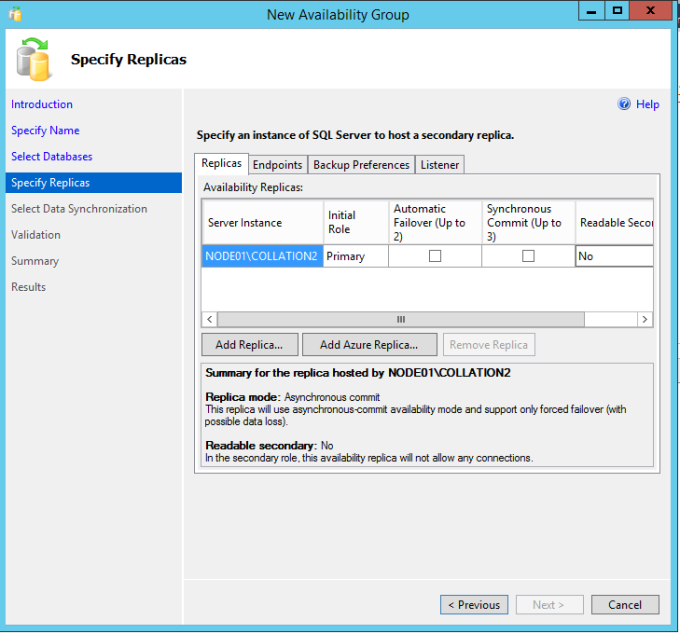
Click Add Replica
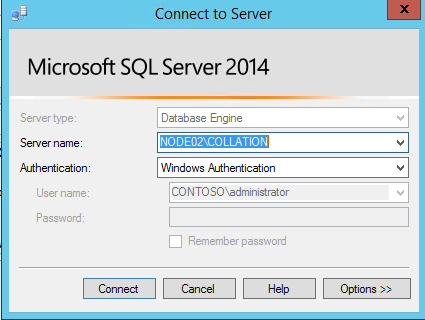
Select Server name for 2nd Node which will be part of the Availability group –> click connect
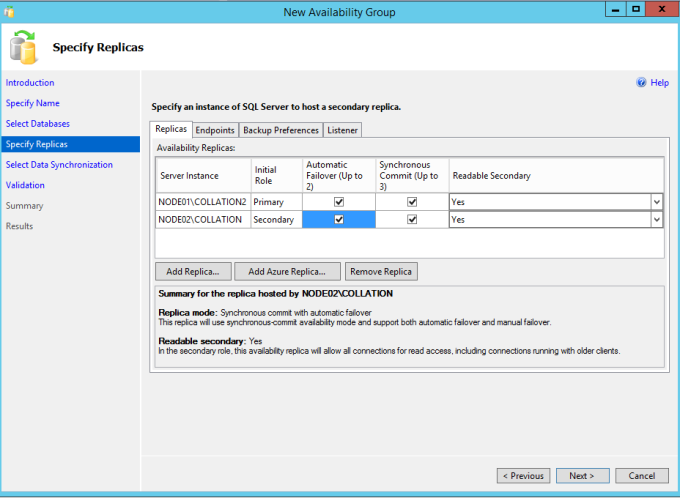
Select options applicable to your environment by selecting Replicas tab options, Endpoints tab options, Backup Preferences tab options. With Listener options choose “Do not create an availability group listener now” we will do this step last –> click Next
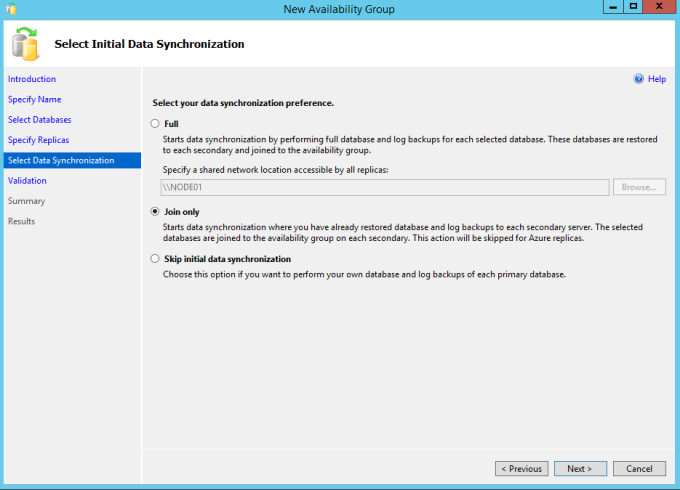
Select Join only –> Click Next
Click Next
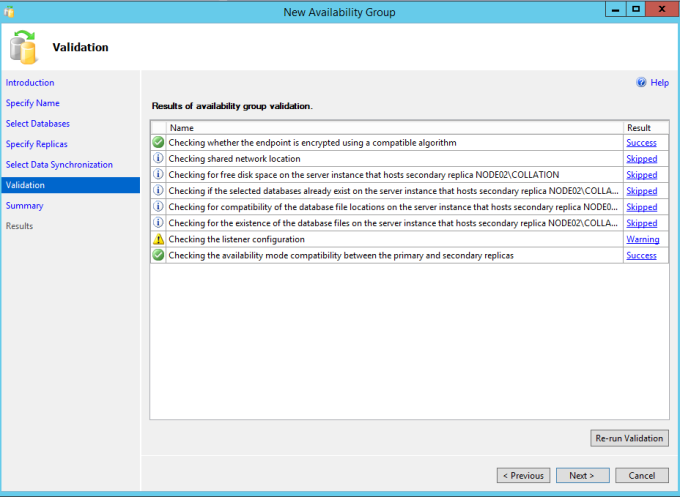
Verify choices and click Finish

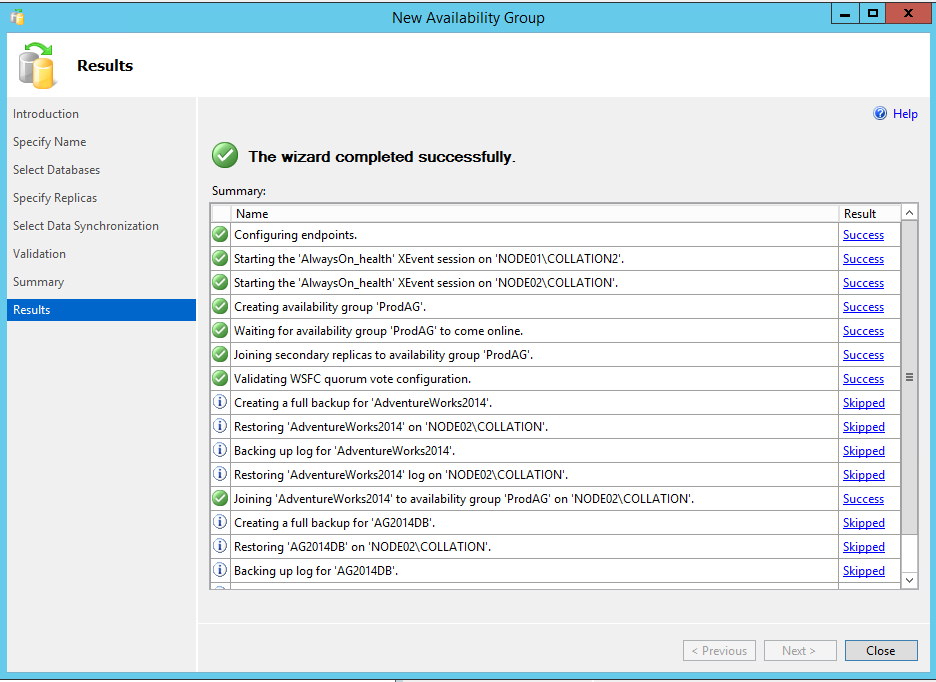
Successfully recreated availability group –> Click Close
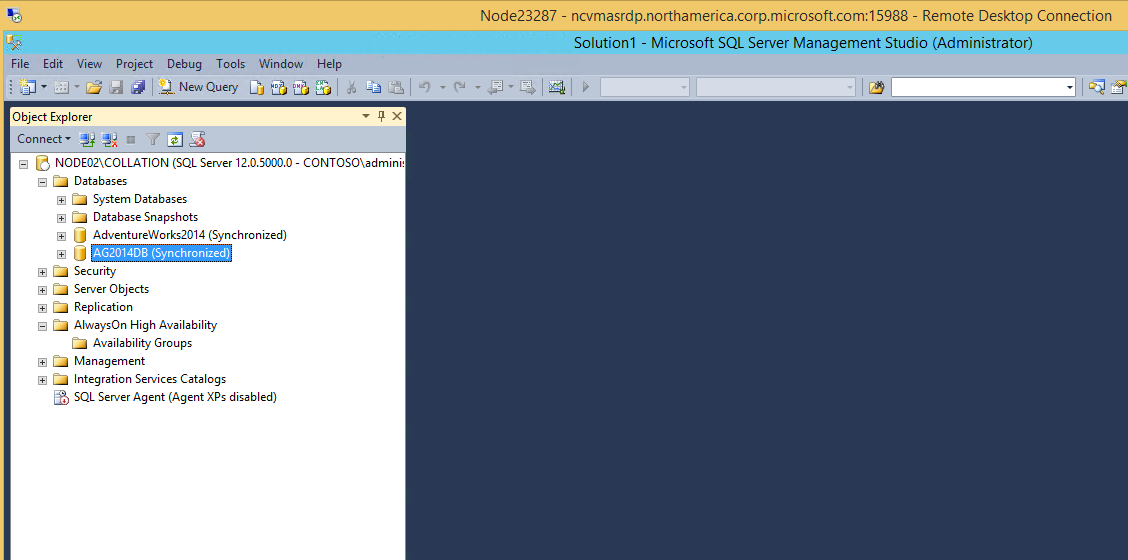
Checked on secondary node and replicas changed from restoring state to Synchronized state
STEP 21: Create a Listener (Last Step after Availability Group is up and running)
https://msdn.microsoft.com/en-us/library/hh213080(v=sql.120).aspx
–Via GUI –> Click AlwaysOn High Availability –> Availability Groups –> ProdAG(primary) –> Availability Group Listeners –> Right click –>Add listener –>Click OK –> Click OK
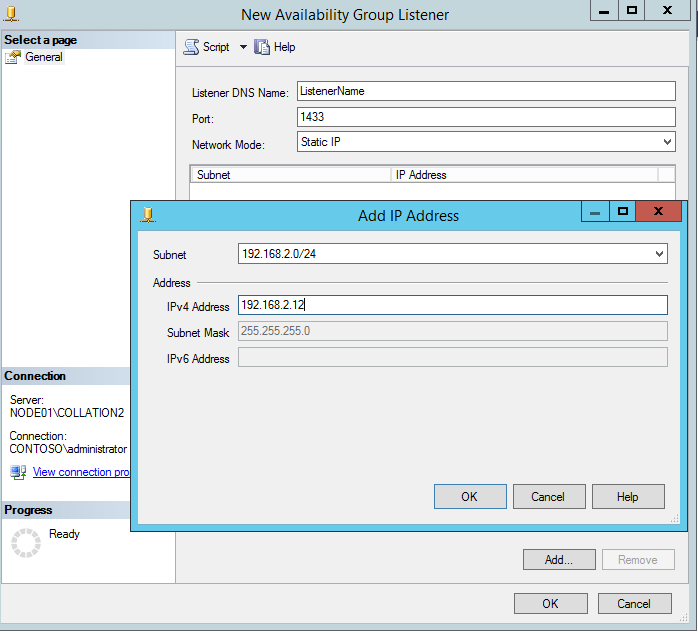
Listener has been added
Comments (2)
Good stuff
Thank you sir